Ship:Myoko

 |
 |
 |
|
 |
| Research price72000 exp |
Purchase price5,800,000  |
| Hit Points37,400 |
| 203 mm/50 3rd Year Type No.2 in a Model D turret5 х 2 pcs. |
| Rate of Fire4.3 shots/min |
| Reload Time14 sec |
| Rotation Speed5 deg/sec |
| 180 Degree Turn Time36 sec |
| Firing Range15.6 km |
| Maximum Dispersion131 m |
| HE Shell203 mm HE Type0 |
| Maximum HE Damage3,300 |
| Chance of Fire17 % |
| Initial HE Velocity840 m/s |
| HE Shell Weight125.85 kg |
| AP Shell203 mm AP Type91 |
| Maximum AP Shell Damage4,700 |
| Initial AP Shell Velocity840 m/s |
| AP Shell Weight125.85 kg |
| 610 mm Triple4 х 3 pcs. |
| Rate of Fire0.9 shots/min |
| Reload Time70 sec |
| Rotation Speed deg/sec |
| 180 Degree Turn Time7.2 sec |
| TorpedoType8 mod. 2 |
| Maximum Damage16,266 |
| Torpedo Speed59 knot |
| Torpedo Range10 km |
| Maximum Speed35 knot |
| Turning Circle Radius780 m |
| Rudder Shift Time9.3 sec |
| Surface Detectability Range12.8 km |
| Air Detectability Range6.6 km |

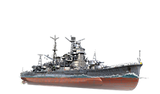
Myōkō — Japanese Tier VII cruiser.
The first Japanese cruiser built after the Washington Naval Treaty of 1922 came into force. Unlike foreign Treaty Cruisers, Myoko’s armor was good enough to withstand artillery strikes from ships of the same type. One of the features of the project was well-developed torpedo protection. Following a series of upgrades, cruisers of this class got a substantially reinforced AA and torpedo armament.
Modules
 | Rate of Fire (shots/min) | 180° Turn Time (sec) | Maximum Dispersion (m) | Maximum HE Shell Damage (HP) | Chances of HE shells causing a fire on target (%) | Maximum AP Shell Damage (HP) | Research price (exp) | Purchase price ( ) | |
|---|---|---|---|---|---|---|---|---|---|
| 203 mm/50 3rd Year Type No.2 in a Model D turret | 4.3 | 36 | 131 | 3,300 | 17 | 4,700 | 0 | 500,000 |
 | Hit Points (HP) | Armor (mm) | Armor (mm) | Main Turrets (pcs.) | Secondary Gun Turrets (pcs.) | AA Mounts (pcs.) | Torpedo Tubes (pcs.) | Hangar Capacity (pcs.) | Research price (exp) | Purchase price ( ) | |
|---|---|---|---|---|---|---|---|---|---|---|---|
| Myōkō (A) | 37,400 | 6 | 102 | 5 | 4 | 2/6/4/4 | 4 | 0 | 530,000 | ||
| Myōkō (B) | 39,200 | 6 | 102 | 5 | 4 | 26/8 | 4 | 17,500 | 1,300,000 |
 | Rate of Fire (shots/min) | Torpedo Tubes Reload Time (sec) | 180° Turn Time (sec) | Maximum Damage (HP) | Torpedo Speed (knot) | Torpedo Range (km) | Research price (exp) | Purchase price ( ) | |
|---|---|---|---|---|---|---|---|---|---|
| Type8 mod. 2 | 0.9 | 70 | 7.2 | 16,266 | 59 | 10 | 0 | 400,000 | |
| Type90 mod. 1 | 0.8 | 76 | 7.2 | 17,233 | 62 | 10 | 16,400 | 1,300,000 |
 | IDS_SHIP_PARAM_SUO_INCREASE_DIST (%) | Maximum Firing Range (km) | Research price (exp) | Purchase price ( ) | |
|---|---|---|---|---|---|
| Type7 mod. 1 | 0 | 0 | 400,000 |
 | Maximum Speed (knot) | Research price (exp) | Purchase price ( ) | |
|---|---|---|---|---|
| Propulsion: 132,000 hp | 35 | 0 | 400,000 |
Compatible Upgrades
| Slot 1 |
 |
 |

| |||
|---|---|---|---|---|---|---|
| Slot 2 |
 |
 |
 |

| ||
| Slot 3 |
 |
 |
 |
 |
 |

|
| Slot 4 |
 |
 |
 |

|
Player Opinion
Performance
Refer to the in-game Port screens for more useful data.
Tier VII Myōkō marks a major improvement over her predecessors. She mounts a heavier main battery compared to Aoba with more torpedoes, providing a much more powerful punch. She continues the trend of the Japanese cruisers, with accurate guns which fire some of the strongest HE shells at her tier, but poor turret traverse and weak AA.
The Ship
Myōkō has a top speed of 35 knots, one of the fastest at her tier, and she can outpace most opponents she will face. Her maneuverability is a mixed bag. Although her turning circle of 780 meters is rather large, her rudder shift of 7.1 seconds is one of the best at Tier VII. She will change directions quickly but needs space to complete her turns, which makes maneuvering in confined spaces difficult. Her concealment of 12.76 km is worse than Aoba, and leaves her more vulnerable to being spotted.
Myōkō mounts a standard cruiser Damage Control Party  , which is active for 5 seconds with a 60 second cool down. Her second slot has a choice of consumables – Hydroacoustic Search
  or Defensive AA Fire
  . Hydroacoustic Search is the optimal choice, to detect torpedoes at 3 km and ships at 4 km for 100 seconds. The Defensive AA Fire will provide a 50% boost to her continuous AA damage, but her weaker AA means the benefits are rather limited. In her third slot, Myōkō carries a Catapult Fighter
  which launches a pair of fighters that patrol around the ship for up to 1 minute. Finally, she mounts a Submarine Surveillance
  which will detect submerged submarines out to 5 km for 20 seconds.
Survivability
With 16 mm of plating, Myōkō’s bow and stern can bounce most heavy cruiser AP when sufficiently angled. However, she is vulnerable to all calibers of HE round, as well as AP overmatch from larger cruiser and all battleship guns. Her citadel runs from the forward turrets all the way to the aft turrets. Although much of it is below the waterline, there is a large raised section between her bridge and rear superstructure. With 102 mm of citadel armor, Myōkō’s citadel is vulnerable to cruiser AP at most ranges, although the presence of anti-torpedo bulges adds a small amount of extra protection. Myōkō has one of the largest health pools for a Tier VII cruiser.
Armament
Myōkō introduces a much-improved main battery from her predecessors. With ten 203 mm guns she has better DPM despite having a slower reload. These guns will become familiar to players, as they form the main armament of the rest of the line with the possible exception of Mogami. Myōkō has the usual improved dispersion common to Japanese 203 mm guns, so players can expect their shells to group closer together. With her larger main battery, Myōkō can land some seriously damaging salvos. A 15.6 km main battery range is decent, although Myōkō faces cruisers with much greater range when downtiered.
Myōkō has typical Japanese HE rounds, with some of the highest damage at her tier and a good fire chance per shell. Between her improved dispersion and high HE damage, Myōkō poses a serious threat to destroyers and even armored targets. Under ideal conditions Myōkō can set up to 7 fires a minute; while this does not match the fire starting potential of many light cruisers, Myōkō will cause more direct damage in between starting fires. Her AP rounds are best used against broadside cruisers, but they lack penetration compared to most 203 mm guns at Tier VII.
As expected, Myōkō mounts a powerful torpedo armament with two triple launchers on each side. A 10 km range is good, but Myōkō lacks the ability to safely launch them from stealth. These also have very restrictive launch arcs, with almost nonexistent forward angles. Her torpedoes are a poor choice as an offensive option, as positioning to attack a target will require showing an almost flat broadside. As such, her torpedoes are more suited for launching at pursuing enemies.
Anti-Air
Myōkō has fairly poor anti-air defenses. Her long-range weapons reach out to 5.8 km but her DPS and flak count are low. She lacks any medium-range weapons, and with her light AA only starting to fire at 2.5 km, they offer little deterrent to any carriers wanting to make an attack.
Anti-Submarine
Myōkō has access to an ASW airstrike, allowing her to attack submarines at up to 6 km away. Each strike drops two charges, and she can have 2 attacks ready to use with a 30 second reload. She can use her Submarine Surveillance consumable to aid in spotting submerged submarines from safe distances. However, her weak armor and poor concealment mean she shouldn’t actively hunt them.
Battle Performance
Myōkō is poorly suited to close range combat, where her slow turret traverse means that tracking maneuvering targets is difficult. Rather she should stay at medium ranges, where she will be able to use her concealment to reach good firing positions and her improved dispersion will allow accurate attacks.
Players will need to use effective positioning and ammunition selection in order to compensate for Myōkō’s low base damage output. A well-aimed salvo can potentially cripple an enemy cruiser or destroyer, if the right ammunition is selected. For this reason, the Gun Feeder captain skill is recommended as it will allow players to more quickly switch ammunition types.
Although her torpedoes can be devastating, their slow speed and high reaction time mean that they cannot be relied on to regularly land serious hits. Their poor launch angles also mean they are dangerous to use at close ranges. But their long range and relatively slow speed make them good area denial weapons, and they can be effective weapons when kiting away or engaging targets which are closing to engage.
Pros:
- Guns are very accurate
- Large main battery
- Torpedoes have high damage
- Good fire chance for a heavy cruiser
- Has access to Hydroacoustic Search consumable
- Thick central deck armor can ricochet shells smaller than 457 mm.
Cons:
- Very weak armor for a heavy cruiser, often takes a large chunk of damage from anything fired at her.
- Vulnerable citadel
- Poor turret traverse
- Restricted torpedo launch arcs
- Poor AA defenses
Research
Optimal Configuration
Upgrades
The recommended upgrades are:
- Slot 1: Main Armaments Modification 1

- Slot 2: Engine Room Protection
 or Hydroacoustic Search Modification 1
- Slot 3: Main Battery Modification 2
 or Aiming Systems Modification 1
- Slot 4: Steering Gears Modification 1

Commander Skills
Recommended Commander Skills 
| ||||||
|---|---|---|---|---|---|---|
| Cost (points) |
Attack | Defense | ||||
1 |
 ★★★ |

|

|
 ★★ |

|
 ★★ |
2 |
 ★★ |

|

|

|
 ★★★ |

|
3 |

|

|
 ★★★ |

|
 ★ |
 ★★ |
4 |
 ★ |

|
 ★ |

|
 ★★★ |

|
| Key: ★★★ - Extremely Useful ★★ - Frequently Useful ★ - Occasionally Useful No stars - Not Useful | ||||||

Consumables
Myōkō can equip the following consumables:
- Slot 1: Damage Control Party
- Slot 2: Defensive AA Fire – 3 charges or Hydroacoustic Search – 3 charges
- Slot 3: Catapult Fighter – 3 charges
- Slot 4: Submarine Surveillance – 3 charges
Signals
Myoko captains should mount the standard flags to improve the ship's performance in battle. To improve upon the ship's armaments, India X-Ray ( ), Victor Lima (
 ), and Juliet Whiskey Unaone (
 ) flags are recommended to increase the fire chance and flooding chances respectively. To improve the ship’s survivability, captains should mount November Foxtrot (
 ) and India Yankee (
 ) flags. Sierra Mike (
 ) flags are recommended to increase the ship’s already high top speed.
Recommended Signal Flags 
| |||||
|---|---|---|---|---|---|
| Combat | |||||

|

|
 ★★ |
 ★ |
 ★★★ |
 ★★ |
 ★ |

|
 ★★ |
 ★★★ |
 ★★ |

|

|

| ||||


