Ship:Mogami

 |
 |
 |
|
 |
| Research price109000 exp |
Purchase price8,800,000  |
| Hit Points35,500 |
| 155 mm/60 3rd Year Type in a triple-gun turret5 х 3 pcs. |
| Rate of Fire6 shots/min |
| Reload Time10 sec |
| Rotation Speed5 deg/sec |
| 180 Degree Turn Time36 sec |
| Firing Range14.2 km |
| Maximum Dispersion131 m |
| HE Shell155 mm HE Type0 |
| Maximum HE Damage2,600 |
| Chance of Fire10 % |
| Initial HE Velocity925 m/s |
| HE Shell Weight55.87 kg |
| AP Shell155 mm AP/APC Type91 |
| Maximum AP Shell Damage3,300 |
| Initial AP Shell Velocity925 m/s |
| AP Shell Weight55.87 kg |
| 610 mm Quad4 х 4 pcs. |
| Rate of Fire0.6 shots/min |
| Reload Time101 sec |
| Rotation Speed deg/sec |
| 180 Degree Turn Time7.2 sec |
| TorpedoType90 mod. 1 |
| Maximum Damage17,233 |
| Torpedo Speed62 knot |
| Torpedo Range10 km |
| Maximum Speed34.5 knot |
| Turning Circle Radius750 m |
| Rudder Shift Time9.3 sec |
| Surface Detectability Range11.7 km |
| Air Detectability Range7.2 km |

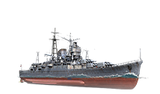
Mogami — Japanese Tier VIII cruiser.
Mogami was built as a light cruiser whose characteristics would largely exceed those of her contemporary counterparts. She had good armor along with a powerful artillery and torpedo armament. During the course of her service she was transformed into a heavy cruiser, as intended by the original design.
Modules
 | Rate of Fire (shots/min) | 180° Turn Time (sec) | Maximum Dispersion (m) | Maximum HE Shell Damage (HP) | Chances of HE shells causing a fire on target (%) | Maximum AP Shell Damage (HP) | Research price (exp) | Purchase price ( ) | |
|---|---|---|---|---|---|---|---|---|---|
| 155 mm/60 3rd Year Type in a triple-gun turret | 6 | 36 | 131 | 2,600 | 10 | 3,300 | 0 | 700,000 | |
| 203 mm/50 3rd Year Type No.2 in a Model E3/E turret | 4.3 | 30 | 121 | 3,300 | 17 | 4,700 | 15,000 | 1,600,000 |
 | Hit Points (HP) | Armor (mm) | Armor (mm) | Main Turrets (pcs.) | Secondary Gun Turrets (pcs.) | AA Mounts (pcs.) | Torpedo Tubes (pcs.) | Hangar Capacity (pcs.) | Research price (exp) | Purchase price ( ) | |
|---|---|---|---|---|---|---|---|---|---|---|---|
| Mogami (A) | 35,500 | 6 | 140 | 5 | 4 | 6/6/4 | 4 | 0 | 690,000 | ||
| Mogami (B) | 39,100 | 6 | 140 | 5 | 4 | 10/4/8/4 | 4 | 28,000 | 2,100,000 |
 | Rate of Fire (shots/min) | Torpedo Tubes Reload Time (sec) | 180° Turn Time (sec) | Maximum Damage (HP) | Torpedo Speed (knot) | Torpedo Range (km) | Research price (exp) | Purchase price ( ) | |
|---|---|---|---|---|---|---|---|---|---|
| Type90 mod. 1 | 0.6 | 101 | 7.2 | 17,233 | 62 | 10 | 0 | 1,300,000 |
 | IDS_SHIP_PARAM_SUO_INCREASE_DIST (%) | Maximum Firing Range (km) | Research price (exp) | Purchase price ( ) | |
|---|---|---|---|---|---|
| Type8 mod. 1 | 0 | 0 | 420,000 | ||
| Type8 mod. 2 | 0 | 12,000 | 900,000 |
 | Maximum Speed (knot) | Research price (exp) | Purchase price ( ) | |
|---|---|---|---|---|
| Propulsion: 152,000 hp | 34.5 | 0 | 650,000 |
Compatible Upgrades
| Slot 1 |
 |
 |

| |||
|---|---|---|---|---|---|---|
| Slot 2 |
 |
 |

| |||
| Slot 3 |
 |
 |
 |
 |
 |

|
| Slot 4 |
 |
 |
 |

| ||
| Slot 5 |
 |
 |
 |

|
Player Opinion
Performance
Refer to the in-game Port screens for more useful data.
Tier VIII Mogami presents players with an unusual choice of two vastly different main battery options. With her stock guns, Mogami appears in her as-built configuration with five triple 155 mm turrets. Alternatively, her main battery can be switched to ten 203 mm guns, representing her 1937 refit. She also carries the familiar powerful and long-ranged Japanese torpedoes.
The Ship
When she is fully specced, Mogami is a fast and stealthy cruiser. Her base concealment of 11.7 km can be reduced to just 9.5 km, allowing her to reach favorable positions with relative ease. Aiding this, her top speed of 34.5 knots makes her one of the faster cruisers at her tier. Additionally, her rudder shift of 7.1 seconds is one of the quickest at Tier VIII and she rapidly responds to changes of direction, although this advantage is somewhat reduced by a 750 m turning circle.
Mogami mounts a standard Damage Control Party  with an action time of 5 seconds and a cool down of 60 seconds. She also carries a Catapult Fighter
  , which launches 3 fighters that patrol around the ship for 60 seconds. In theory they can provide some aerial defense, but in practice they will usually watch while the enemy CV carries out an unimpeded attack against their ship due to their short engagement range. In her other consumable slot, players can choose between a Hydroacoustic Search
  or Defensive AA Fire
  . The Hydroacoustic Search has an action time of 100 seconds and will detect ships at 5 km and torpedoes at 3.5 km. This has 3 uses as standard with a 120 second cool down between uses. Her Defensive AA Fire is standard for a Tier VIII cruiser, providing a 50% bonus to AA DPS and 300% boost to her flak damage. The recommended option is Hydroacoustic Search, both for its improved utility and due to Mogami’s weak AA defenses.
Armor & Survivability
Mogami’s health pool is rather typical of a Tier VIII cruiser. She does not have access to a heal, so any damage taken is permanent and mistakes can be costly. Her bow and stern plating is 25 mm thick, allowing Mogami to bounce up to 356 mm AP rounds if she is sufficiently angled, but most battleships within her matchmaking range can still overmatch these areas. Mogami has a long citadel, which stretches along most of her hull between her front and rear turrets, with a large section that is just 100 mm thick. Her main battery turrets are rather lightly armored with just 25 mm of protection, which leaves them open to being knocked out by cruiser-caliber HE rounds. Although it is long, her citadel is mostly low in the water, making it difficult to hit. At short ranges, she can take serious damage from cruiser AP, although Mogami is not unique in this fact. This is slightly mitigated by the midsection having a turtleback which can deflect some AP rounds.
Armament
Mogami mounts a powerful torpedo armament. Four quad launchers, two on each side, allow her to launch potentially devastating salvos at unsuspecting targets. A 10 km range gives players a small window where they can be fired from stealth. The high hitting power of these torpedoes is somewhat countered by their high detectability, with targets getting 9.6 seconds of reaction time to take evasive action. This is one of the worst at her tier, and means that full salvos are unlikely to hit a target outside of short ranges.
Even when fully upgraded, Mogami has a rather short maximum gun range of 15.7 km. Players will need to be cautious when engaging targets as this is well within the effective range of many battleships. Both armament options retain the standard Japanese traits — powerful HE rounds and slow turret traverse times.
155 mm Guns
Her main battery initially consists of fifteen 155 mm guns in five triple turrets. Although a 10 second reload is rather slow for their size, the number of guns means that she still has a similar DPM to other light cruisers. As her shells are 155 mm rather than the usual 152 mm, they hit harder than most light cruisers and have slightly increased penetration. Compared to other light cruisers, her fire starting potential is somewhat limited at a base 9 fires per minute. With the Inertial Fuse for HE Shells skill, Mogami is capable of penetrating high tier battleship bow/stern plating as well as casemate armor on British and French battleships and the 38 mm decks of most high tier American battleships and large cruisers. This allows for more reliable damage at the cost of fire-starting abilities. At short ranges, her AP rounds pose a threat to other cruisers and her large salvo size can prove devastating to unwary targets. Unlike other Japanese cruisers with 203 mm guns, Mogami’s 155 mm guns use normal cruiser dispersion rather than destroyer dispersion.
203 mm Guns
Mogami’s upgraded main battery changes from 155 mm guns to 203 mm guns, which drastically cuts her DPM but allows her to directly damage a larger range of targets. They may lack the power of Baltimore’s weapons, but they still pose a serious threat to enemy cruisers which show too much broadside. Her HE shells are some of the most powerful at her tier and are a serious threat to bow in battleships. Like other Japanese 203 mm cruisers, these guns use destroyer dispersion instead of cruiser dispersion.
Anti-Aircraft
Like most Japanese ships, Mogami has relatively weak AA defenses. Her long-range weapons reach out to 5.8 km but her DPS and flak count are low. She lacks any medium-range weapons, and with her light AA only starting to fire at 2.5 km, they offer little deterrent to any carriers wanting to make an attack.
Anti-Submarine
Mogami has access to an ASW airstrike, allowing her to attack submarines at up to 7 km away. Each strike drops two charges, and she can have 2 attacks ready to use with a 30 second reload.
Battle Performance
Mogami can be played in several different ways, depending on the combination of captain skills, upgrade modules and main battery armament. She can be equipped with the Concealment System Modification 1  upgrade for a typical cruiser experience, using her concealment to reach an advantageous position. Alternatively, Steering Gears Modification 2
  can be a viable option for players who are confident in their situational awareness and ability to dodge incoming fire.
203 mm main battery:
155 mm main battery:
Overall, Mogami is a rare beast; she offers the potential of several different play styles from the same ship. Arguably, her stock main battery offers the strongest option where she stands out among other light cruisers due to her improved HE penetration. When armed with her 203 mm guns, she is unremarkable but still a capable cruiser even without the gimmicks of other nations.
Pros:
- Modular gun system which gives you freedom of play style.
- 155's have good HE penetration
- 155's have high DPM
- 203's have improved dispersion
- Good rudder shift
- Long torpedo range
- Good concealment
Cons:
- Armor is rather thin
- Weak AA defenses
- 155's turrets are poorly armored
- Slow turret traverse
- Limited torpedo arc
Research
It is suggested to research Hull B first to get more HP, then finally acquire the upgraded Fire Control System to kite away ships better.
Optimal Configuration
Upgrades
The recommended upgrades for Mogami are as follows:
- Slot 1: Main Armaments Modification 1
 keeps the guns and torpedo tubes active and firing.
 - Slot 2: Engine Room Protection
 to keep the rudder in action.
 - Slot 3: Main Battery Modification 2
 makes her guns more comfortable and saves a skill point that would otherwise be spent on Grease the Gears to improve her gun handling with the 155 mm guns. Aiming Systems Modification 1
  gives her guns more accuracy and is an alternative option, particularly for the 203 mm guns, which have a higher base traverse speed than the 155 mm guns.
 - Slot 4: Steering Gears Modification 1
 allows for a faster rudder shift to dodge incoming fire. Propulsion Modification 1
  can also be used to aid dodging incoming fire and torpedoes via speed juking, depending on your preferred play style.
 - Slot 5: See below.
Concealment Build
Captains wishing to focus their Mogami to maximize her concealment will opt for Concealment System Modification 1 in Upgrade Slot 5. This will lower her surface detection up to 9.4 km. This can be used to ambush ships.
Maneuverability Build
Captains wishing to focus maneuverability will opt for Steering Gears Modification 2 in Upgrade Slot 5. This, when combined with Steering Gears Modification 1, will lower her rudder shift time up to 3.4 s, while maintaining 10.3 km surface detection range. Excellent rudder shift time, good turning radius, and great deceleration will make her hard to hit.
Commander Skills
203mm Main Battery
Players who opt for the upgraded main battery will find that Mogami plays somewhat like Atago with these weapons. Fire starting is possible, but will be limited in effect.
Recommended Commander Skills 
| ||||||
|---|---|---|---|---|---|---|
| Cost (points) |
Attack | Defense | ||||
1 |
 ★★★ |

|

|
 ★★ |
 ★ |
 ★★ |
2 |
 ★ |
 ★ |

|

|
 ★★★ |
 ★ |
3 |

|

|
 ★★★ |
 ★ |
 ★★ |
 ★★ |
4 |

|

|

|

|
 ★★★ |

|
| Key: ★★★ - Extremely Useful ★★ - Frequently Useful ★ - Occasionally Useful No stars - Not Useful | ||||||

155 mm Main battery with IFHE
Players who can afford to dedicate points into the IFHE skill will notice a more consistent damage output from their main battery guns. It should be noted that this captain build is poorly suited for the ships which follow her.
| Recommended Commander Skills
| ||||||
|---|---|---|---|---|---|---|
| Cost (points) |
Attack | Defense | ||||
1 |
★★★ |
★ |
|
★★★ |
★★ |
★★ |
2 |
|
★ |
|
|
★★★ |
|
3 |
★ |
★ |
★★★ |
|
★★ |
|
4 |
|
|
★ |
★★★ |
★★★ |
|
| Key: ★★★ - Extremely Useful ★★ - Frequently Useful ★ - Occasionally Useful No stars - Not Useful | ||||||
155 mm Main Battery without IFHE
Mogami can also be built as a standard light cruiser with a bigger focus on fires. She will not be as effective in this role as several other light cruisers, but she can still be effective. Players will be subject to more RNG with this build and may struggle to have an impact if they fail to start many fires.
| Recommended Commander Skills
| ||||||
|---|---|---|---|---|---|---|
| Cost (points) |
Attack | Defense | ||||
1 |
★★★ |
★ |
|
|
★★ |
★★ |
2 |
★★★ |
★ |
|
|
★★★ |
|
3 |
★ |
★ |
★★★ |
|
★★ |
|
4 |
|
|
★★ |
|
★★★ |
|
| Key: ★★★ - Extremely Useful ★★ - Frequently Useful ★ - Occasionally Useful No stars - Not Useful | ||||||
Consumables
Mogami can equip the following consumables:
- Slot 1: Damage Control Party
- Slot 2: Defensive AA Fire – 3 charges or Hydroacoustic Search – 3 charges
- Slot 3: Catapult Fighter – 3 charges
- Slot 4: Submarine Surveillance
 – 3 charges
Signals
Recommended Signal Flags 
| |||||
|---|---|---|---|---|---|
| Combat | |||||

|

|
 ★★ |
 ★ |
 ★★★ |
 ★★ |
 ★ |
 ★ |
 ★★ |
 ★★★ |
 ★★ |

|

|

| ||||


