Ship:Minegumo

 |
Purchase priceSpecial  |
| Hit Points15,100 |
| 127 mm/50 3rd Year Type on a Type C mount3 х 2 pcs. |
| Rate of Fire10 shots/min |
| Reload Time6 sec |
| Rotation Speed6.9 deg/sec |
| 180 Degree Turn Time26.1 sec |
| Firing Range10.9 km |
| Maximum Dispersion97 m |
| HE Shell127 mm HE Type1 |
| Maximum HE Damage2,150 |
| Chance of Fire9 % |
| Initial HE Velocity915 m/s |
| HE Shell Weight23 kg |
| AP Shell127 mm AP Type0 |
| Maximum AP Shell Damage2,200 |
| Initial AP Shell Velocity915 m/s |
| AP Shell Weight23 kg |
| 610 mm Quad2 х 4 pcs. |
| Rate of Fire0.6 shots/min |
| Reload Time100 sec |
| Rotation Speed deg/sec |
| 180 Degree Turn Time7.2 sec |
| TorpedoType 93 |
| Maximum Damage20,966 |
| Torpedo Speed57 knot |
| Torpedo Range15 km |
| Maximum Speed35 knot |
| Turning Circle Radius640 m |
| Rudder Shift Time3.6 sec |
| Surface Detectability Range6.6 km |
| Air Detectability Range3 km |

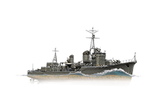
Minegumo — Japanese special premium Tier IX destroyer.
The Asashio-class was a group of 10 destroyers that were built for the Imperial Japanese Navy between 1937 and 1939. The Asashio’s were designed as an improvement over the preceding Shiratsuyu-class destroyers. The Japanese government allows the London Naval Treaty to expire without ratification whose limitations disallowed improvements to the Shiratsuyu class without exceeding limits. No longer adhering to limitations, the displacement and hull length of the Asashio class were increased to improve the speed and operational range.
Minegumo was laid down March 22, 1937 and launched November 4, 1937. She began the war escorting troop convoys in the Dutch East Indies. She was one of the destroyers present in the Battle of the Java Sea and contributed to the victory against the ABDA fleet. She served as an escort in the Battle of Midway and the Eastern Solomons before transferring to the “Tokyo Express” for the Solomon Island transport operations.
In this role she would be heavily damaged by an air attack on October 5, 1942. She would return in early 1943 and continue transport operations. However soon after she would run into a USN Cruiser-Destroyer task force during a transport run and would be sunk in the ensuing battle.Minegumo was first released for sale on 16 Feburary 2024.
Modules
 | Rate of Fire (shots/min) | 180° Turn Time (sec) | Maximum Dispersion (m) | Maximum HE Shell Damage (HP) | Chances of HE shells causing a fire on target (%) | Maximum AP Shell Damage (HP) | Research price (exp) | Purchase price (  ) ) | |
|---|---|---|---|---|---|---|---|---|---|
| 127 mm/50 3rd Year Type on a Type C mount | 10 | 26.1 | 97 | 2,150 | 9 | 2,200 | 0 | 0 |
 | Hit Points (HP) | Armor (mm) | Armor (mm) | Main Turrets (pcs.) | Secondary Gun Turrets (pcs.) | AA Mounts (pcs.) | Torpedo Tubes (pcs.) | Hangar Capacity (pcs.) | Research price (exp) | Purchase price ( ) | |
|---|---|---|---|---|---|---|---|---|---|---|---|
| Minegumo | 15,100 | 13 | 20 | 3 | 2 | 2 | 0 | 0 |
 | Rate of Fire (shots/min) | Torpedo Tubes Reload Time (sec) | 180° Turn Time (sec) | Maximum Damage (HP) | Torpedo Speed (knot) | Torpedo Range (km) | Research price (exp) | Purchase price ( ) | |
|---|---|---|---|---|---|---|---|---|---|
| Type 93 mod. 2 dw | 0.6 | 100 | 7.2 | 20,966 | 57 | 15 | 0 | 0 |
 | IDS_SHIP_PARAM_SUO_INCREASE_DIST (%) | Maximum Firing Range (km) | Research price (exp) | Purchase price ( ) | |
|---|---|---|---|---|---|
| Type9 mod. 1 | 0 | 0 | 0 |
 | Maximum Speed (knot) | Research price (exp) | Purchase price ( ) | |
|---|---|---|---|---|
| Propulsion: 50,000 hp | 35 | 0 | 0 |
Compatible Upgrades
| Slot 1 |
 |
 |

| ||
|---|---|---|---|---|---|
| Slot 2 |
 |
 |

| ||
| Slot 3 |
 |
 |
 |
 |

|
| Slot 4 |
 |
 |
 |

| |
| Slot 5 |
 |
 |
 |

| |
| Slot 6 |
 |
 |
 |

|
Player Opinion
Performance
Refer to the in-game Port screens for more useful data.
The Ship
Minegumo is a Japanese destroyer that shares the same play style that captains of the Japanese “torpedo boat” Destroyer line will be familiar with. She has excellent concealment and some of the most potent torpedoes found at her tier. Her biggest differentiating trait is her ability to use two different types of torpedoes simultaneously in battle while her tech tree counterparts, while also having access to multiple types of torpedoes, can only take one.
Minegumo has the same hull as her sister. Her hull is covered with 19mm plating. The hull plating is thin enough for most AP to overpenetrate the hull and is thick enough to bounce AP at steep angles up to 270 mm in caliber . Her superstructure is 13mm thick and gun mounting is 20mm thick. She will be most vulnerable to HE shells which have no trouble penetrating any part of her hull, likewise a well placed hit will easily knock out her hull modules.
Minegumo is quite slow for her tier with a base speed of 36 knots but has decent maneuverability with a 640 m turning circle and a rudder shift time of 3.6 seconds. Her base hit point total is 15,100 and can be increased to 18,250 using Survivability Expert. Her base concealment is 6.6km and can be reduced to 5.4km using Concealment Expert and Concealment System Modification 1  , currently the lowest detectability possible at Tier IX.
Armament
Minegumo uses the same guns and turret layout as her sister Asashio, six 127 mm guns in an A-XY turret layout, with two superfiring turrets facing aft and one turret facing forward. Her turret handling is similar to other vessels using the 127mm/50 Type 3 guns, her turrets have generous firing arcs both forward and aft however turret traverse is quite slow and it is difficult for her to keep her guns on target in a short ranged knife fight. Her base reload is long at 6 seconds but somewhat makes up for it with her high alpha HE shells, while she still lacks the damage per minute values of the more gun oriented destroyers she can deal a noticeable amount of damage to an unprepared enemy destroyer. Her AP shells are less impressive and are mostly useful against lightly armored cruisers at short range. She shares the same shell ballistics as the other ships mounting the 127mm/50 Type 3 guns.
Similar to Asashio and Yugumo, Minegumo carries two quadruple torpedo launchers. Minegumo has the option of two torpedoes: the long range but slow Type 93 Torpedoes, or the fast but incredibly short ranged Type F3 Torpedoes. Her unique trait that sets her apart from the main line Japanese destroyers is the ability to take both types of torpedoes into battle at the same time. If a captain wishes to switch the type of torpedo they are using, switching between them takes 5 seconds. Minegumo is able to easily choose which torpedo to launch depending on the engagement she is in. Both torpedo options have a 100 second long reload and switching the torpedo type during reload will extend it by 5 seconds.
Consumables
Minegumo only comes with the standard set of consumables: Damage Control Party  , Engine Boost
  , and Smoke Generator
  . In exchange for the ability to launch two different types of torpedoes in battle she does not get access to a torpedo reload booster like Yugumo. Her consumables are best used defensively to break line of sight or escape unfavorable matchups. The engine boost can be necessary to somewhat mitigate her low base speed.
Anti-Aircraft
The anti-aircraft armament of Minegumo is poor. She only has access to a short ranged aura that extends out to 2.5 km with 10.50 dps of continuous damage. She has no ability to throw up flak clouds and is only able to attack aircraft once they are into or about to enter their attack run. Her best defense against aircraft will be avoiding detection, using her smoke screen if necessary. Captains are free to leave her anti-aircraft armament enabled as the range only extends out to her detection from the air.
Battle Performance
Minegumo is first and foremost a torpedo oriented combatant. Her low detection and hard hitting torpedoes make her one of the best options to catch an enemy vessel off guard. She performs well on a flank away from the main battle launching torpedoes at unsuspecting large vessels. When using the Type 93 torpedoes vessels that are not heavily maneuvering or moving slowly will be your best targets with their attention likely elsewhere. In a cap contesting role she will be able to outspot most and counter spot any enemy destroyers that she faces. In most cases it is not recommended to engage offensively with her guns unless the opponent is already at a disadvantage. In a gun fight it is best to retreat while using her rear oriented armament to return fire. Her Type F3 Torpedoes are a good option to flush out enemy destroyers that may be hiding in smoke screens.
If a captain is bold they can get to within range of larger vessels to use the much faster Type F3 torpedoes for a higher chance of hitting but captains will need to be cautious of the 1 km difference between her lowest detection radius and F3 torpedo range.
Combat Capability - Alternative Torpedoes

Requirements:
Effects:
- Torpedo-type switching time: 5 seconds
- Type93: 57 knots, 15 km range, 20,967 damage
- Type F3 mod. 1: 77 knts, 6.5 km range, 21,367 damage
Pros:
- High damage on her HE shells.
- Ability to switch between two types of torpedoes in battle
- High damage and either fast or long range torpedoes.
- Excellent concealment, tied for the lowest detection achievable at Tier IX.
Cons:
- Low base top speed
- Slow main battery reload with ineffective AP shells
- Slow turret traverse on the main battery guns
- Poor AA defenses.
Research
Optimal Configuration
Minegumo should be tailored toward improving her concealment and torpedo armament first, second priority should be placed in her survivability. Her main guns are not as impactful as her torpedoes.
Upgrades
The recommended upgrades are:
- Slot 1: Main Armaments Modification 1

- Slot 2: Engine Room Protection

- Slot 3: Torpedo Tubes Modification 1

- Slot 4: Propulsion Modification 1

- Slot 5: Concealment System Modification 1
- Slot 6: Torpedo Tubes Modification 2

Commander Skills
Recommended Commander Skills 
| ||||||
|---|---|---|---|---|---|---|
| Cost (points) |
Attack | Defense | ||||
1 |

|
 ★★ |
 ★ |
 ★ |
 ★ |
 ★★★ |
2 |
 ★ |
 ★★ |
 ★ |

|
 ★ |
 ★★★ |
3 |
 ★ |
 ★★★ |
 ★★ |

|
 ★ |
 ★★ |
4 |
 ★ |
 ★★ |
 ★★ |
 ★ |
 ★★★ |
 ★ |
| Key: ★★★ - Extremely Useful ★★ - Frequently Useful ★ - Occasionally Useful No stars - Not Useful | ||||||


Consumables
Minegumo equips the following consumables:
- Slot 1: Damage Control Party
- Slot 2: Smoke Generator – 3 charges
- Slot 3: Engine Boost – 3 charges
Camouflage
As a premium ship, Minegumo comes with Default permanent camouflage and a set of permanent combat bonuses.
Signals
Recommended Signal Flags 
| |||||
|---|---|---|---|---|---|
| Combat | |||||

|

|

|

|

|

|

|

|

|

|

|

|

|

| ||||

Gallery
Historical Info
Historical Gallery
Video
References
