Ship:Satsuma

 |
 |
 |
| Research price0 exp |
Purchase price57,000,000  |
| Hit Points119,200 |
| 510 mm/45 Type 98 in a twin-gun turret4 х 2 pcs. |
| Rate of Fire1.7 shots/min |
| Reload Time35 sec |
| Rotation Speed3 deg/sec |
| 180 Degree Turn Time60 sec |
| Firing Range27 km |
| Maximum Dispersion278 m |
| HE Shell510 mm HE Type 98 |
| Maximum HE Damage8,100 |
| Chance of Fire40 % |
| Initial HE Velocity765 m/s |
| HE Shell Weight2620 kg |
| AP Shell510 mm AP Type 98 |
| Maximum AP Shell Damage19,400 |
| Initial AP Shell Velocity765 m/s |
| AP Shell Weight2620 kg |
| Maximum Speed27 knot |
| Turning Circle Radius1020 m |
| Rudder Shift Time22.4 sec |
| Surface Detectability Range18 km |
| Air Detectability Range10 km |

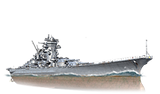
Satsuma — Japanese Tier ★ battleship.
A further development of the Design A-150 super battleships, equipped with an even stronger battery of eight 510 mm guns.
Satsuma was released into the Japanese tech tree on 14 April 2022.
Modules
 | Rate of Fire (shots/min) | 180° Turn Time (sec) | Maximum Dispersion (m) | Maximum HE Shell Damage (HP) | Chances of HE shells causing a fire on target (%) | Maximum AP Shell Damage (HP) | Research price (exp) | Purchase price ( ) | |
|---|---|---|---|---|---|---|---|---|---|
| 510 mm/45 Type 98 in a twin-gun turret | 1.7 | 60 | 278 | 8,100 | 40 | 19,400 | 0 | 0 |
 | Hit Points (HP) | Armor (mm) | Armor (mm) | Main Turrets (pcs.) | Secondary Gun Turrets (pcs.) | AA Mounts (pcs.) | Torpedo Tubes (pcs.) | Hangar Capacity (pcs.) | Research price (exp) | Purchase price ( ) | |
|---|---|---|---|---|---|---|---|---|---|---|---|
| Satsuma | 119,200 | 10 | 650 | 4 | 4/14 | 30/20/14 | 0 | 0 |
 | IDS_SHIP_PARAM_SUO_INCREASE_DIST (%) | Maximum Firing Range (km) | Research price (exp) | Purchase price ( ) | |
|---|---|---|---|---|---|
| Type 11 mod. 1 | 0 | 0 | 0 |
 | Maximum Speed (knot) | Research price (exp) | Purchase price ( ) | |
|---|---|---|---|---|
| Propulsion: 166,000 hp | 27 | 0 | 0 |
Compatible Upgrades
| Slot 1 |
 |
 |
 |

|
|---|---|---|---|---|
| Slot 2 |
 |

| ||
| Slot 3 |
 |
 |
 |

|
| Slot 4 |
 |
 |
 |

|
| Slot 5 |
 |
 |

| |
| Slot 6 |
 |
 |

|
Player Opinion
Performance
Refer to the in-game Port screens for more useful data.
Combat Capability - Immediate Main Battery Fire Adjustment

Requirements:
Required number of qualified gun shots: 10
Effects:
- Maximum main battery disperson: -35%
- Action time: 25 seconds
Satsuma is the supership of the Japanese Battleship tech tree, armed with eight 510mm guns; the largest in the game. She shares similar characteristics to both Yamato and Shikishima, with the inclusion of the Immediate Main Battery Fire Adjustment combat instruction that increases her strength in accurate long range fire support.
Armament:
Satsuma features eight 510mm guns (the same guns as Shikishima) housed in 4 twin turrets. These guns have a high range of 27km which is further increased by the Spotter Plane consumable.
While her guns are massive at 510mm, they do not provide any more meaningful overmatch in comparison to Yamato’s 460mm guns. The AP shells overmatch 35mm plating and feature high alpha damage and high penetration. Her HE shells have a 40% fire chance and 85mm penetration. Satsuma’s high-caliber guns allow her to overmatch and deal damage to every ship in her matchmaking spread as long as aiming and dispersion allow.
While her guns are accurate, they feature worse dispersion values than that of Shikishima. This is offset with Satsuma having 8 guns and the ability to use Main Battery Fire Adjustment combat instruction, which decreases maximum dispersion by 35% for 25 seconds. Shikishima has a slow reload, at 30.8 seconds after equipping Main Battery Modification 3.
The turrets on Satsuma are very slow, with a 180 degree turn time of 57.5 seconds. Careful positioning and map awareness are necessary to ensure all guns remain in the fight.
Survivabillity:
Satsuma's hull features a similar armor scheme to her predecessor Yamato. Her concealment of 14.5 is higher than average for a battleship. Her hull has a high health pool of 119,200 and has an improved torpedo damage reduction of 58.6%. Her overall armor scheme is good, with 57mm deck plating and 32mm bow and stern armor. However, her citadel is very large and retains the ‘cheek’ plating weakness. At closer ranges, high caliber AP shells will penetrate and citadel Satsuma through the cheek of her bow armor.
As a result of her armor layout, Satsuma captains should play her at medium to long ranges.
Maneuverability:
Satsuma is a slow battleship, with a top speed of 27 knots. Her rudder shift time and turning circle radius is average at 22.4s and 1020m respectively. Early positioning is vital due to her slow speed preventing quick relocation.
Anti-Aircraft:
Satsuma has poor long/medium AA DPS (161 and 371 respectively). Her low DPS and flak count of 6 means it is not enough to stop an aircraft carrier from striking. Grouping up with allied ships to overlap Anti-Aircraft auras is recommended in games with carriers.
Battle Performance:
Satsuma is a ship that Yamato players will find familiar. The core gameplay of long range artillery support remains the same even with the addition of 510mm guns and the Main Battery Fire Adjustment combat instruction.
Satsuma fills the classic sniper battleship role, positioning around +15km away from cap circles and providing crossfire onto enemy battleships and cruisers. Satsuma’s poor close range armor scheme and slow hull speed mean she is not a brawler. Because of the overmatch on her 510mm guns, players should mainly fire AP at cruisers and capital ships. The addition of the Main Battery Fire Adjustment combat instruction allows her to provide devastating salvos with improved accuracy, This makes Satsuma much more consistent in her role, providing with correct aiming. Due to the nature of the combat instructions, players will find more success in firing as much as possible to fulfill the requirements for the Main Battery Fire Adjustment.
Satsuma is a mixture of the battleships Yamato and Shikishima. Satsuma delivers accurate 8 shell salvos that feature 35mm overmatch and high alpha with the ability to reduce her dispersion by 35% with combat instructions.
Pros:
- High HP pool
- Largest guns in the game with high penetration, alpha damage, and overmatch
- Combat instructions that reduce dispersion by 35%
Cons:
- Large target
- Large citadel with cheek weakness
- Long reload
- Slow turret traverse
- Poor AA DPS
Research
Optimal Configuration
Upgrades
The recommended upgrades are:
- Slot 1: Main Armaments Modification 1

- Slot 2: Damage Control System Modification 1

- Slot 3: Aiming Systems Modification 1

- Slot 4: Damage Control System Modification 2

- Slot 5: Concealment System Modification 1

- Slot 6: Main Battery Modification 3

Commander Skills
Recommended Commander Skills 
| ||||||
|---|---|---|---|---|---|---|
| Cost (points) |
Attack | Defense | ||||
1 |
 ★ |

|

|
 ★★ |

|
 ★★ |
2 |
 ★★★ |

|

|
 ★ |
 ★★ |

|
3 |

|

|
 ★★★ |
 ★★ |

|

|
4 |

|

|

|
 ★★★ |
 ★★★ |
 ★★★ |
| Key: ★★★ - Extremely Useful ★★ - Frequently Useful ★ - Occasionally Useful No stars - Not Useful | ||||||
Consumables
Satsuma equips the following consumables:
- Slot 1: Damage Control Party

- Slot 2: Repair Party

- Slot 3: Spotting Aircraft
 or Catapult Fighter
Signals
Recommended Signal Flags 
| |||||
|---|---|---|---|---|---|
| Combat | |||||

|
 ★★★ |
 ★★★ |
 ★ |

|

|

|

|
 ★ |
 ★★ |
 ★★ |
 ★★★ |

|

| ||||


Gallery
Historical Info
Historical Gallery
References

